WELCOME~

Growing up in a small town, we didn't have housing developments. What we had were streets lined mostly with trees and homes built by individuals. I remember when a small housing development began across town and I couldn't help but think how weird it was that a bunch of mostly identical homes were being built so close to each other... it was stark,ugly, and made me uncomfortable. I remember thinking I'd never live in a housing development..I'd always be in my own unique space. I was very young and I was very wrong. I didn't end up in a sunny cottage on the edge of town or a small farm out in the boonies.. I have landed in a house that's just like every 4th or 5th house in a housing development in small town suburbia. I realized that regardless of where you are..or what cookie cutter home one lives in, there are a buh-zillion and one ways to make it your own. From my own little suburban *cottage* you will find me posting anything from cooking to sewing to flower watching.. people watching, short stories, poetry, rants, raves and anything else you can imagine~ Please stay awhile, explore all little parts of my life. You may find your self, laughing, rolling your eyes, disgusted, inspired, aggravated, happy, ect ect ect..
Thanks so much for stopping by and sharing in my joy~

Wednesday, May 16, 2012

Rustic Chips & Salsa~


Easy to make and even easier to eat, these rustic little seasoned triangles of joy will become your new addiction!
  If you are like me and think that Chips & Salsa should be listed on the meal part of menus and not just the appetizer list then you are going to LOVE this recipe. If you can call it a recipe.
   Here's how ya do it..

You need small corn tortillas
or
Small flour tortillas
or both if you prefer
Olive oil
Salt
Chili Powder
Garlic seasoning
a small non stick saute or frying pan
a pizza cutter
tongs
Salsa
Lots of something to drink

On medium heat, let your olive oil get hot..
toss in a tortilla and swirl it in the oil and quickly turn it over. 
Then sprinkle your chili powder, garlic seasoning and salt. Easy on all 3 seasonings, these really don't need much  and you can easily over do it. On the corn tortillas I skip the salt.
Let the tortilla cook on both sides browning and crisping, then remove from heat to a cutting board. You will need to cut the CORN tortillas immediately into triangles. The flour tortillas may cool for awhile before you cut them. 
Every 3 or 4 tortillas you will want to wipe out your pan, The salt and chili powder accumulate and need to be removed from the bottom of your pan, it's easy.. grab a wad of paper towels and wipe and set aside for repeat.
 You may also need to add oil as you go, just don't over do it.
 The chips aren't like your crispy store bought kind, these will remain bendable ( the better to scoop with.. oh My!)
 And I am betting your faves will be the flour chips, They are lightly crispy on the outside and warm and soft on the inside. They are more filling than the corn chips and tastier. I always like to add a few of the corn tortilla chips tho.. Try them warm . 

Flour Tortilla
~

Corn Tortilla
~


How gorgeous is THAT??   Ready to be devoured!

click the link below for the salsa recipe ~


 ~E N J O Y~


backyard suburbia~

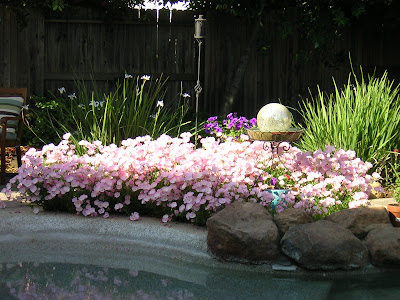
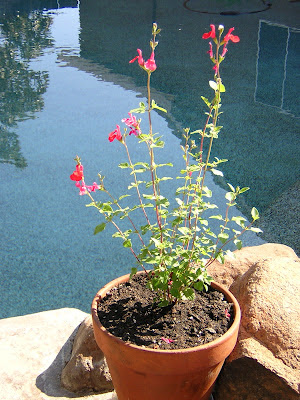
I love my back yard. Love my front yard too, but it's not as fun as my back yard. This is where I plant  and love almost whatever will grow. I usually replant many of my containers with simple petunias or millionbells.. They grow fast, have bright colors and last thru out the summer and fall.. But mixed in are plenty of other perennials that have somehow managed to survive my *gardening skillz*. Nature is so forgiving.. and here are a few of my backyard darlings~
I hope you enjoy.


~~~~~

Below is a small peek at one of my favorite places in my front yard.. more pics to come.. 


 Have a faaaantastic day~


Saturday, May 12, 2012

Lemon filled White Cake with Strawberry-Kiwi Salsa


I love simple cakes, not to sweet, not too heavy, simple light cakes with a lovely fruit~
 Here is my lovely Lemon filled White Cake with Strawberry-Kiwi Salsa.
 Again, because the foods I make are simple.. you can change up the fruit to make whatever kind of fruit salsa you want.As a matter of fact, I am going to make a variation of this for Mothers Day with a Lemon filled Lemon Cake with raspberry-strawberry salsa. 

 To start with you will need a 2 baked layers of white cake, cooled and the humps sliced off.. you want this cake to be nice and flat..
 You will need your lemon filling, cooled. See recipe below.
 Fruit salsa
and heavy whipping cream, sweetened to taste and whipped til its stands up and pays attention!


Start by dicing your fruit
I used probably 8 or 10 nice, ripe Strawberries 
and 2 Kiwis


 Now you have Fruit Salsa
At this stage, mix it together in a small bowl with a touch of splenda blend sugar and let it rest. After about 15 mins, I drain the most, but not all of the juice so my cake doesn't get soggy.
~
Next you take your first layer

You can see where I have  sliced the top off leaving  a nice flat surface. if you wanted you can actually slice a very shallow well for the filling and salsa to fit into a little better if you like more fruit in yours. otherwise if you stack too much fruit and filling your top layer may decide to travel.
~


This now has a spread of the lemon filling, you can kind of see the yellow peel sprinkled in.
~

Now you can see the Salsa layered on the top. I also added a thin layer of whipped cream before layering the fruit salsa, but I forgot to take a picture.. oops.. It doesn't matter when you add the layer of whipped topping so long as you add it after the lemon filling.
~
Place your second layer on the fist layer bottom up.
~


Spread a thin layer of lemon filling on the top of this layer, then frost the cake with your whipped topping and garnish as you like.
 Place the cake in your refridge to vacation for an hour or 2 letting everything chill nicely, serve with additional whipped topping and lemon filling if desired. Or whatever else you want~

Enjoy~

 Happy Mothers Day~


Lemon Filling

3/4 Cup Sugar
3 tablespoons cornstarch
1/4 tsp salt
2/3 cup water
1 Tablespoon margarine or Butter
1 teaspoon grated lemon peel
1/4 c freshly squeezed lemon juice


Mix together sugar, cornstarch and salt in a med saucepan. Slowly stir in water. Cook over medium heat , stirring constantly, until mixture thickens up and boils. Boil for 1 minute then remove from heat. Stir in lemon juice.
cover and chill in your fridge for a couple of hours.

~~~~

 and few tips about the whipping cream.
Chill the bowl you plan on whipping your cream in. Also if you want to flavor your whipping cream I sometimes use kool aid mix straight from the packet... you will want to add your sweetner to your whipping cream first, add a little of the kool aid powder to taste and maybe go back and forth taste testing to get it where you want it... then whip it like there is no tomorrow~
. Its an easy way to add flavor to your whipped cream.. 


Tuesday, May 8, 2012

Easy Kickin' Pasta~


~ Easy  Kickin’ Southwestern Pasta~

The slow heat in this pasta sauce is delicious and smooth.. just enough warmth to make you put away couple of glasses of ice tea while you are eating it, but not so hot that your tongue is numb. The balance between the Southwestern flavors and typical Italian seasonings is wonderful and simple.

Sauce
~
1/2 pound Ground Beef
1/2 pound ground Pork Sausage
1/2 med onion, finely chopped
1-2 cloves Garlic to taste, Minced
1 (6 Ounce) Tomato Paste
1 teaspoon Dried Parsley
1 teaspoon Dried Basil
1/2 teaspoon Salt
1 Tablespoon olive oil ( or to taste )
1- 10 oz can of southwestern style diced tomatoes with green chili’s
1- 20’ish oz jar of prepared spaghetti sauce
3/4 c water * optional
~

In a very large pan, fry up your ground beef, ground pork and onion. Drain the fat.
 In the same pan stir in olive oil, the canned diced tomatoes, the garlic, tomato paste, dried parsley, dried basil, and salt.
This is where you may choose to add water so this mix can simmer for about 5 minz… just long enough to get the flavors sharing.
 Then dump in the entire jar of prepared spaghetti sauce, I used Classico brand Italian Sausage. I love that brand because it’s simple like me, and I love the mason jar it comes in, adds to my hillbilly wine glass collection.. hahaha..
 So anyway, back to the sauce… let your sauce softly simmer while you are making your pasta; It’s a heavier sauce so I chose a rigatoni. Generously spoon this over your cooked pasta,  
   and serve~


 I love how the sauce gets all up inside the pasta. Serve it up with your fave bread and plenty of whatever you drink and call it dinner!
 YUUUM!!
 This is a very simple sauce recipe that is easily tailored to your taste. You may choose to add more or less of an ingredient to make this your own!
  

Tuesday, May 1, 2012

Easy Roses~

You can have beautiful roses for next to nothing by growing your own bushes from cuttings. 


here is how you do it~
Scope out established rose bushes.. your neighbors yard, old houses and even better are older cemeteries where a long forgotten rose bush from another era could be hiding out, and find the rose you want to propagate ~
Make sure when you take your cuttings you have a jar of water in which to place them to keep them from wilting, once wilted your cutting will not root.

 For repeat flowering bushes you can take the cuttings from a young, firm stem that has a few leaves on it..the blooms can be fading. It's important to try to get a few leaves left on the stem as this will promote rooting. I started with about an 8 inch stem then cut it down to fit in my *greenhouses* leaving about 6- inches..I eyeballed it..


  here are the materials you need..

I selected 2 different roses, one is a pretty pink and the other is a bright orange with a yellow center.
~


Here I have my biodegradable pots,
growth hormone, 
and my self made individual green houses which are the two 2 liter bottle tops. 
Not showing this pic is a sharp rose clipper.. you need to have a sharp cutter so you don't crush the stems when you clip..and  potting soil. I used Miracle grow potting soil.
~


 Place dirt in your little pots and move on to the next step


Next take your stem and *wound* it. Roses can form roots at any point on the stem but most people usually choose to wound theirs at the base of the cutting. I cut in at a diagonal about a half an inch then I slice vertically into the bark or skin removing it with your clipper blade.
~
  

You can see the wounded part of the stem has been dipped in water then into the powdered rooting hormone. 
~


Now place your stem in your little pot of dirt. Using the Bottle tops of 2 liter bottle place them over the cutting to form a very easy and handy *greenhouse*. You want high humidity for your roses. 
~
.


See how quickly the humidity formed?

Keep in mind that you want to maintain humidity and moisture for your rooting to be successful.
Your rooting will love light but in the heat of the mid day sun place your little baby in the shade so the greenhouse effect doesn't cook them.~

little greenhouse rose nursery. cute!


More info
Most cuttings are rooted best in early spring and summer when the temperatures are still friendly..

You can expect your stem to root anywhere from 2 - 8 weeks depending on the variety and mood of the stem.
In order to tell if your cutting has rooted it may have new leaves growing on it.. or you can also give it a slight tug and if you have resistance it probably has roots.
Once your cuttings have established strong roots , remove them from their rooting area, also removing the greenhouse, and place them in a cool shady spot for a few days to acclimate it. Placing it immediately in the direct sun could kill your new plant so Please allow it to harden off before planting. You can then place your baby in the ground or a container, keeping a close eye on it until it's settled in and comfy~

I hope I've included all the directions.. but if you have questions let me know..
Enjoy creating your own little nursery~
LUVZ~